Building a Site in MODX
How To Build a Complete Working Site In 90 Minutes
At the MODXpo in Ultrecht in 2012 I gave a presentation on how to set up a complete site in 90 minutes. It actually only took about an hour; the rest of the time could have been used to install and configure one or two custom features, such as a gallery or a blogging system.
This series of articles is an in-depth discussion of each step of that process. It is updated from time to time to reflect the current versions of both the It Fits template and MIGX, as well as changes to MODX and its Manager interface.
Installation
Of course, you'll first need a working MODX installation. Before you even begin, if you aren't going to be developing on the MODX Cloud, make sure that your hosting solution meets the minimum requirements for a properly functioning MODX. MODX Revolution is fairly hefty, and doesn't do well on cheap mass hosting solutions.
There are several ways to get the files uploaded to your server. The best way is to upload the .zip archive and unzip the files directly on the server. There is a simple PHP script that you can upload to your server and run from your browser to perform that task for you.
Once you have MODX installed and working, it's time to start configuring your site.
System Settings
To begin with, establish your web server's rewrite rules to allow friendly URL rewriting. If you are using Apache, you can simply re-name the included ht.access file in your site root to .htaccess. If your site is being run from a subdirectory, make sure to edit that to show the subdirectory in the RewriteBase directive. Here are some examples for using other web servers such as lighttpd and nginx.
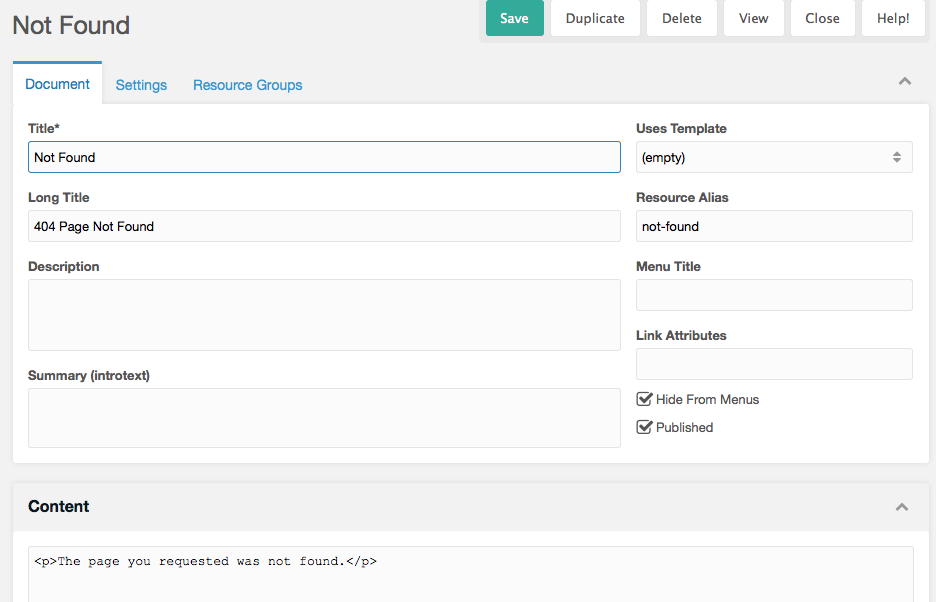
Create a new resource, name it Not Found, with an alias of not-found, and set it to be published and to not show in the menu. Assign it to have a blank template, and put something like "Page Not Found" into its Content field.
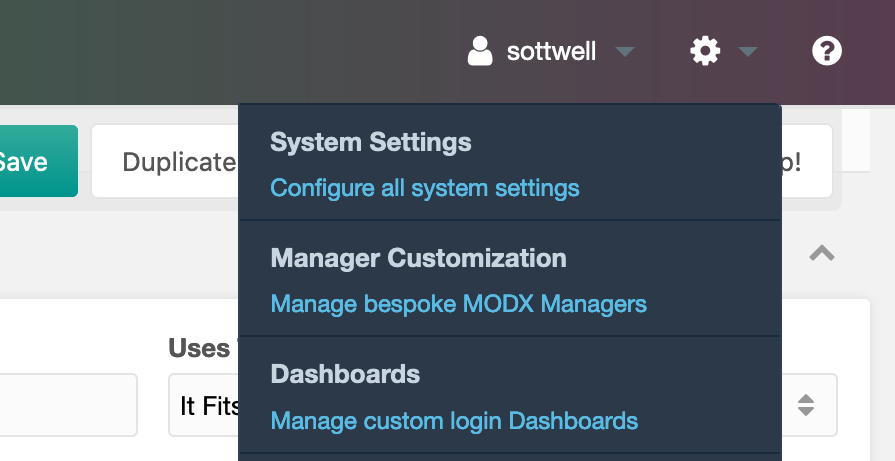
Now, in the Manager, go to System -> System Settings. In later versions of MODX, this is represented in the main Manager menu by the gear icon in the right section of the menu.
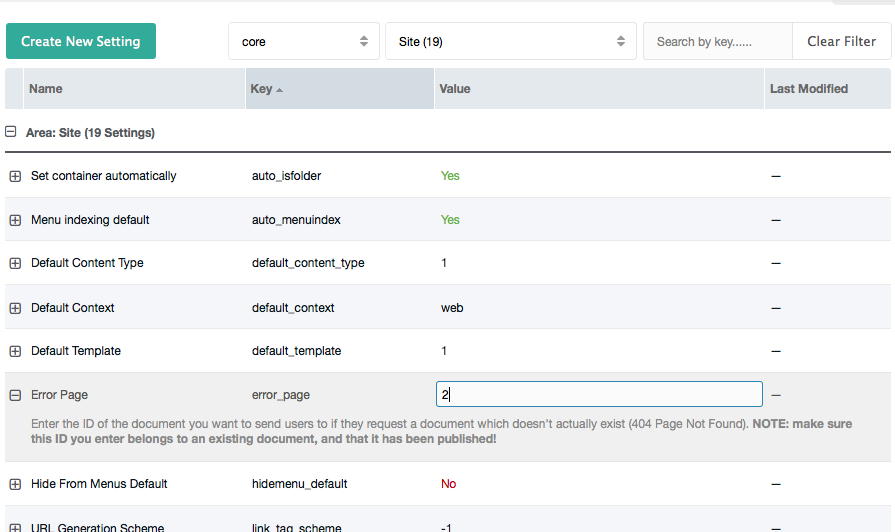
In the Filter by area drop-down, select "Site". Change the error_page setting to reflect the resource ID of that "Not Found" resource we created earlier - it should be 2. Simply double-click on the Value field, edit, then either hit Enter or click outside of the input field. A little red triangle will appear to indicate a change in the field, then it will disappear as the new value is automatically saved.
Scroll down to the "Site name" row, and edit the site name in the same way.
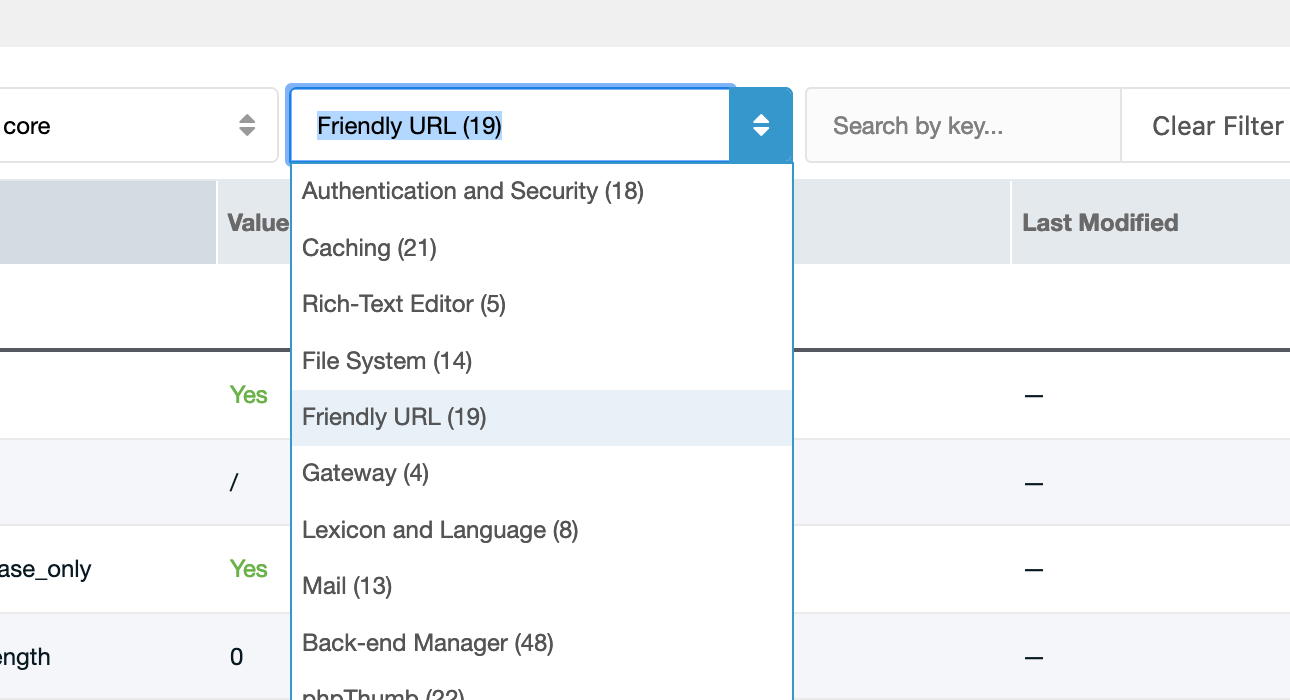
Now in the Filter by area drop-down, select "Friendly URL". Scroll down and change the Use Friendly URL to yes. In your browers, try using the friendly URLs to access your not-found.html page and back to the index.html page. If this isn't working, check your web server's rewrite rules.
Adding Packages
By itself, MODX doesn't come with much in the way of extra functionality. This is provided by add-on packages. Let's install the add-ons we'll be using; these are the packages most commonly needed for basic site functionality. Go to System -> Package Management, and click on the Download Extras button. This will take you to the official MODX add-on repository. You can browse for add-ons in various categories, or you can use the search field to get to add-ons that you know you want to download.
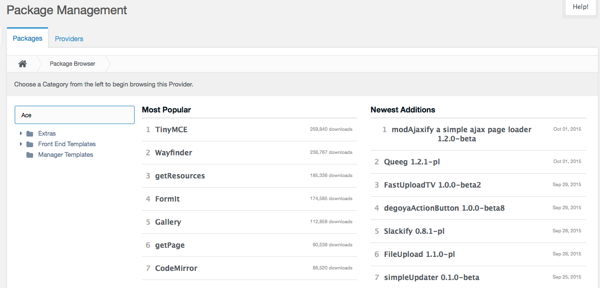
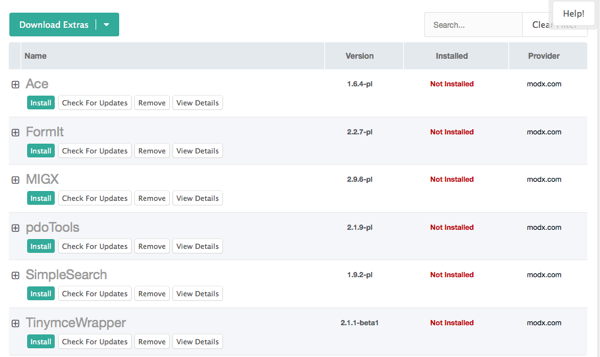
We want to download several packages:
- Ace - for a nice editing interface for Elements
- Formit - for processing forms like a contact form
- MIGx - for creating custom Template Variables
- pdoTools - for generating dynamic lists of all kinds
- SimpleSearch - for searching
- TinyMCEWrapper - for a Rich Text editor for Resources
Once these are downloaded, click Back to Package Management. Your newly downloaded packages will show, with green Install buttons for each. Go ahead and install them.
The next step is to creat your theme's Templates. I'll cover that in the next installment